(writing the first program)
If you are tired of talking and want some action – let’s not waste anymore time. In this part you will learn how to set up a project using MPLab, write a simple program and run it on your microcontorller.
Before we start I must mention that there are 2 IDEs that Microchip has made. MPLab and MPLab X. I tried MPLab X few times and even when it wasn’t beta anymore there were still things that doesn’t work. On the other hand the old MPLab has a crappy editor. Because you can use external editor I would recommend using MPLab and just to cover it all I’ll write about MPLab X at the end of this tutorial.
Downloading and Installing MPLab
If you bought PIC Kit 2 you might already have the MPLab installation CD, but as it’s written on the CD it’s recommended to download the latest version:
http://www.microchip.com/mplab8
I found this permanent link that redirects to big-bad-url, but if it doesn’t work go to Microchip website and search for “MPLab 8” or Google it.
Scroll to the bottom of the page and download the file with title MPLAB IDE v<N.NN>, where the <N.NN> is the version (for example MPLAB IDE v8.92).
When you install make sure that you select Hi-Tech C and Microchip C18. You can leave the rest by default.
Starting a project
I prefer to start a project with the project wizard because it’s less likely to forget something. From menu “Project” select “Project Wizzard…”.
The first step (well technically the second) is choosing a device. That’s not permanent, so if you want you can change it later. I’ll use PIC16F648A as an example:
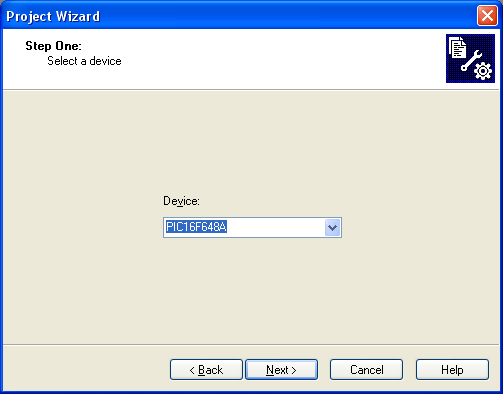
You can use any of PIC16F628A or PIC16F627A – they are fully compatible. Actually for the first example there will be no much difference what MCU you use as long as it’s Microchip’s PIC16 series.
Next thing is to choose toolsuite (or in other words compilers, linkers … and stuff). Choose Hi-Tech C and I promise we’ll have a look at assembly language later. One step at a time:
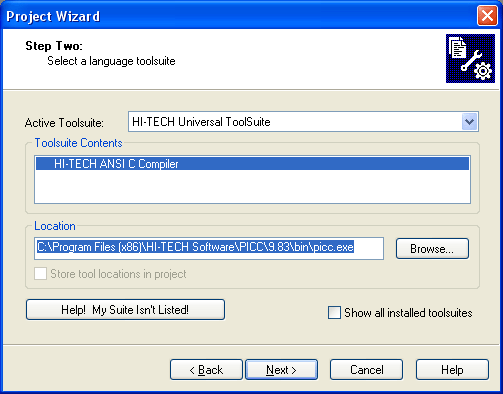
If you see red cross in front of the Hi-Tech compiller … then you forgot to install it. If you do, close MPLab, run the setup again and make sure you check the “Hi-Tech C Compiller” option.
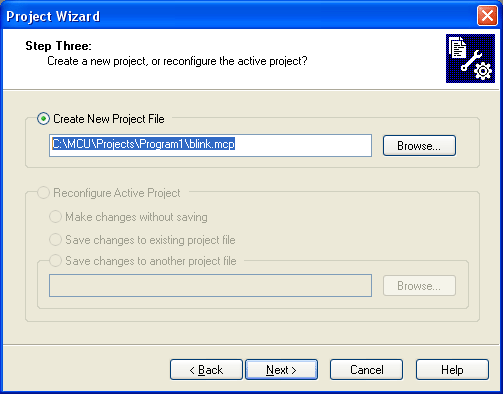
On the third step you have to select where your proiect file will be located at. Choose a separate directory for each project – like “C:\MCU\Projects\Program1\project-name” and not “C:\MCU\Projects\project-name”:
 Yes, we are just going to blink a LED. The first thing you must learn in microcontrollers is to always take small steps because there are so many things that can go wrong and you can loose days to track multiple prblems.
The next step is to add some files to the project. Of course when you start a new project you have no files, so – skip this step.
That’s it. Click on finish and you have a project.
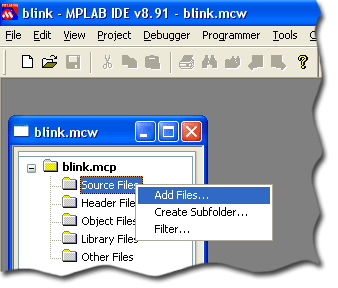
Now choose File->New (or click on the “New File” icon). Choose “File->Save as …”. Pay close attention on what path you are in when saving a file. MPLab does not change directory to project directory as you might think. If you do not save all files in the project directory you will be sorry later. Save the file as “blink.c” (do I have to tell it’s without the quotes?!?). Then add the file to the project:
 |
 |
Ok. Now you can start with dummy program which does nothing:
void main(void){
    while(1){
    }
}
Now press F10 to compile. It’s implortant to compile as often as possible and resolve the problems before they become too many. A common problem on first compile is this error:
Error [939] ; . no file arguments
It means that you forgot to add the file to the project.
If it compiles you can continue with making the program actually do something:
#include "htc.h"

__CONFIG(FOSC_INTOSCIO & MCLRE_OFF & BOREN_OFF & PWRTE_ON & WDTE_OFF & LVP_OFF);

void init(void){

  PCONbits.OSCF = 0; // set internal oscillator to 48kHz

  // by default all ports are set to inputs and analog functions are enabled

  CMCON = 0x07;
  TRISA0 = 0; // set RA0 (pin 17) as output
  RA0 = 0; // we start with the LED off
}

void main(void){
    unsigned int i;

    while(1){ // repeat forever

        RA0 = 1; // LED on
        for(i=0;i<255;i++){ // wait a bit
          // do nothing
        }

        RA0 = 0; // LED off
        for(i=0;i<255;i++){ // wait a bit more
        }
    } //while
}

Press again F10 to compile.